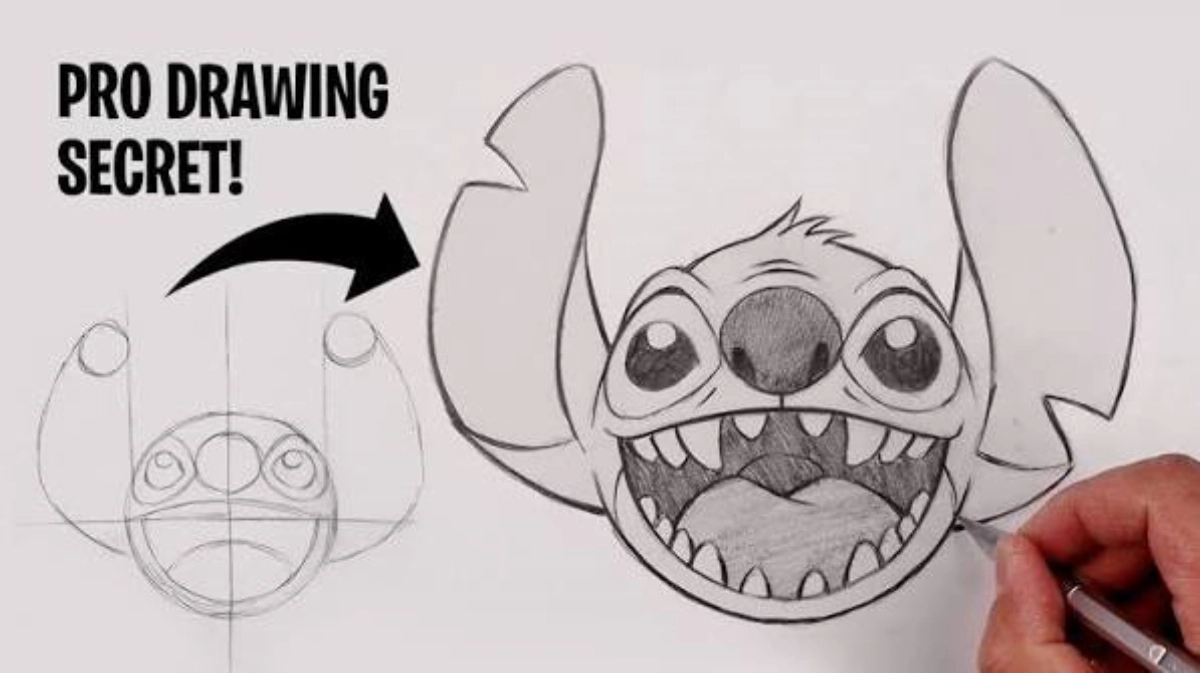
How to Draw Stitch: A Beginner’s Guide to Getting His Iconic Look
Most people don’t know how to draw Stitch. They end up with something close, but not quite right, usually because a proportion is off or a color detail is missing. This beginner-friendly guide to how to draw stitch takes a shape-first approach so you can build the recognizable silhouette before adding the smaller details.
If you’re practicing how to draw stitch without getting stuck on the details, begin with the head, ears, eyes, and compact body. Those features do most of the work.
What Actually Makes Stitch Look Like Stitch
Before picking up a pencil, it helps to know what you’re aiming for. Three traits do most of the work in making a drawing read as “Stitch” rather than some generic blue creature: oversized ears nearly as tall as his head, eyes set close together with no visible pupils, and a compact, koala-like body with short, stubby limbs.
Get these three right, and the rest of the drawing falls into place naturally.
How to Draw Stitch Step by Step
Step 1: Gather Your Tools
When learning how to draw stitch, you don’t need anything fancy to start. Use:
- Plain paper or a sketchbook page
- A pencil for loose construction lines
- An eraser for cleanup
- A black fine-tip marker or pen for final inking
- Blue, light aqua-blue, pink, and black coloring supplies
Step 2: Start With Simple Shapes
Skipping straight to details is one of the easiest ways to make a Stitch drawing look off. Instead, block in three simple shapes first: an oval for the head, a slightly larger rounded shape for the body, and thin tapering ovals for the limbs.
Keep the head a touch smaller than the body. Leave generous space above the head for the signature ears.
Step image: Basic head, body, and limb construction shapes.
Step 3: Build the Head and Get the Ears Right
The ears are the priority because their size strongly affects the whole silhouette.
- Draw a rounded oval for the head, slightly wider near the top.
- Extend two long, curved ears upward from the top of the head.
- Make the ears nearly as tall as the head, curving them slightly outward rather than straight up.
- Shade the outer tips of the ears a touch darker than the rest of the fur.
- Add a light vertical and horizontal guideline across the head to help keep the face symmetrical.
Step image: Head oval with oversized curved ears and construction guidelines.
Step 4: Place the Face for Maximum Expression
Once the head shape is set, the face brings Stitch’s personality through.
- Draw two large oval eyes close together, just below the horizontal guideline.
- Keep the eyes solid black with no visible pupil.
- Add a small, dark nose centered beneath the eyes.
- Sketch a wide mouth line, adding a soft pink tone inside along with a couple of small teeth for his classic mischievous grin.
- Erase the guidelines once everything is aligned.
If you want to know how to draw stitch so the face feels recognizable, pay close attention to eye spacing and the position of the nose. Small changes can affect the expression.
Step image: Stitch face with close-set eyes, centered nose, and mouth.
Step 5: Add the Body, Limbs, and Hidden Detail
Draw a rounded body beneath the head, tapering slightly at the neck. Then:
- Sketch two short, sturdy arms ending in small paws with a few claws.
- Add two short legs at the base of the body.
- Keep every limb short rather than elongated, since length is one of the fastest ways to break the compact silhouette.
In his true alien form, Stitch, also known as Experiment 626, has a second, smaller pair of arms tucked beneath the main ones, plus a few small spines along his back. He usually keeps these retracted to pass as an ordinary dog, so drawing him with just two arms or with all four, plus spines, is accurate depending on which version you’re capturing.
Step image: Compact body with short arms, legs, paws, and optional extra arms.
Step 6: Finish With the Tail and Antennae
Add a short, curved tail at the back of the body rather than a long one. Stitch’s tail is stubby, not sweeping.
His antennae, when shown, sit between the ears and can be sketched as two thin, slightly curved lines with rounded tips. Since he can retract these too, you can leave them off for the classic disguised look.
Step image: Tail and optional antennae added to the completed sketch.
Step 7: Clean Up and Outline
Once the proportions and facial features look right, use the eraser to remove unnecessary construction lines. Check the silhouette before inking.
Look especially at:
- Ear size and curve
- Eye spacing
- Head-to-body proportion
- Limb length
- Overall rounded silhouette
Use a black fine-tip marker or pen for the final lines. Keep the construction stage light enough that cleanup does not damage the finished drawing.
Step 8: Color for Accuracy
Color choices matter almost as much as shape accuracy for making the drawing recognizable.
| Area | Color | Why it matters |
| Main body | Bright blue | Base fur color across most of the body |
| Belly and around eyes | Light aqua-blue | Softer countershading distinct from the main coat |
| Eyes and nose | Black | Sharpest contrast, gives the alert expression |
| Inner ears and mouth | Pink | Adds warmth and finishes the face |
| Claws | Dark blue | Small but accurate finishing detail |
If you’re learning how to draw stitch and want the finished result to look recognizable, don’t rush the coloring stage. Use the lighter aqua-blue areas to create contrast against the main blue body, then add the pink and black details carefully.
Step image: Fully colored Stitch with blue, light aqua-blue, pink, black, and dark blue details.
Where Beginner Drawings Usually Go Wrong
A quick self-check against these common issues can save a lot of frustration.
- Ears drawn too small, which shifts the whole silhouette away from Stitch’s proportions
- Eyes placed too far apart, softening the alert expression that defines his face
- Limbs stretched too long, breaking the compact, rounded body shape
- Flat, single-tone coloring that skips the lighter belly countershading
- Missing pink details in the ears and mouth, which make the drawing feel unfinished
For a more accurate result, compare your sketch against these points before you add the final outline.
Easy Stitch Drawing for Kids
For kids or absolute beginners, strip the process down to four basic shapes: one oval for the head, one for the body, two tall curved ears, and simple stick-like limbs ending in small paw shapes.
Add two dot eyes, a small nose, and a curved mouth line. This keeps Stitch recognizable without requiring precision on every detail, making it a good starting point before attempting the fuller version above.
Step image: Simplified four-shape Stitch drawing for younger artists.
How to Draw Stitch for Beginners: A Quick Version
If you want a simple way to practice how to draw stitches, build the character in this order:
- Head oval
- Large curved ears
- Close-set eyes
- Nose and mouth
- Rounded body
- Short arms and legs
- Tail and optional alien features
- Clean outline
- Color details
This order keeps the largest shapes under control before you spend time on facial details or coloring.
Frequently Asked Questions
What’s the single most important detail to get right when drawing Stitch?
His ear size and shape matter more than almost any other feature; if the ears are too small or the wrong shape, the drawing won’t read as Stitch even if everything else is accurate.
How many arms does Stitch actually have?
Four, though he usually keeps the extra pair and his back spines retracted so he can pass as a regular dog.
What colors should I use for coloring Stitch?
A bright blue for the body, a lighter aqua-blue for the belly and eye area, black for the eyes and nose, pink for the inner ears and mouth, and dark blue for the claws.
Is this drawing style suitable for kids?
Yes, especially the simplified four-shape version, which removes most of the precision requirements while keeping Stitch recognizable.
Was Stitch’s fur always blue?
No, he was originally designed with green fur before the color was changed to blue during production.
Do I have to draw the antennae and extra arms?
No, both are optional since Stitch retracts them to look more like a dog; drawing him without them is just as accurate as drawing his full alien form.
Why does my drawing look “close but not right”?
Usually it comes down to one of a few things: ears too small, eyes spaced too far apart, or limbs drawn too long, all of which subtly shift the silhouette away from Stitch’s actual proportions.
Can I skip the coloring step and just do a line drawing?
Yes, a clean black-and-white line drawing is a complete project on its own, though adding color helps confirm you’ve captured all the distinguishing details correctly.
Final Tips for a Better Stitch Drawing
The easiest way to improve how to draw stitch is to work from large shapes to small details. Start with the head and body, make the ears large enough, position the eyes close together, and keep the limbs short. Once the silhouette feels right, move on to the expression, outline, and color.
The goal isn’t to make every line perfect on the first attempt. A clean construction stage gives you room to correct proportions before the final details are added.
With practice, how to draw stitch becomes less about memorizing every feature and more about recognizing the proportions that make the character unmistakable.